参考学习网址:
VS Code C语言开发环境配置附图版保姆教程
VS Code C语言开发环境配置第四步三个文件c_cpp_propertise.json、launch.json、tasks.json的内容_vsc中tesk.json使用什么语言
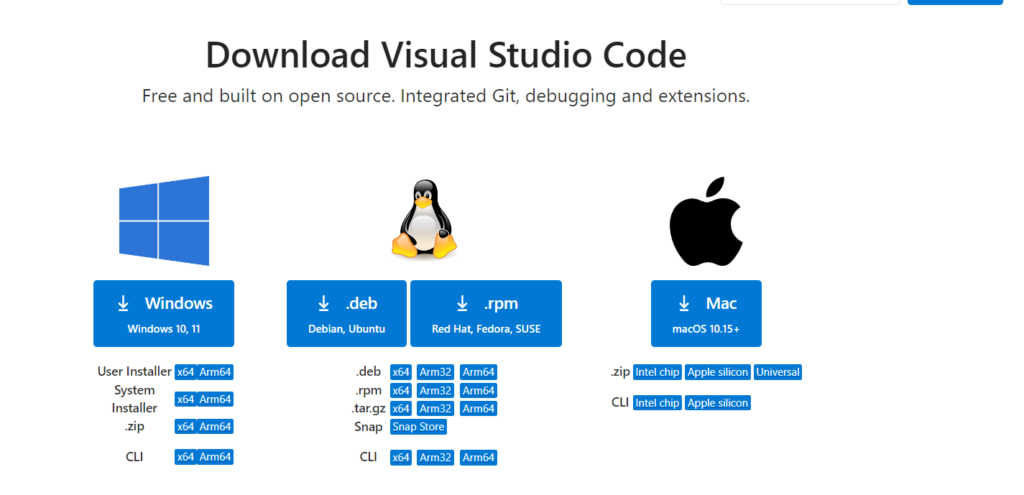
安装vscode
Visual Studio Code 最好不要安装在C盘

下载安装,根据自己电脑系统
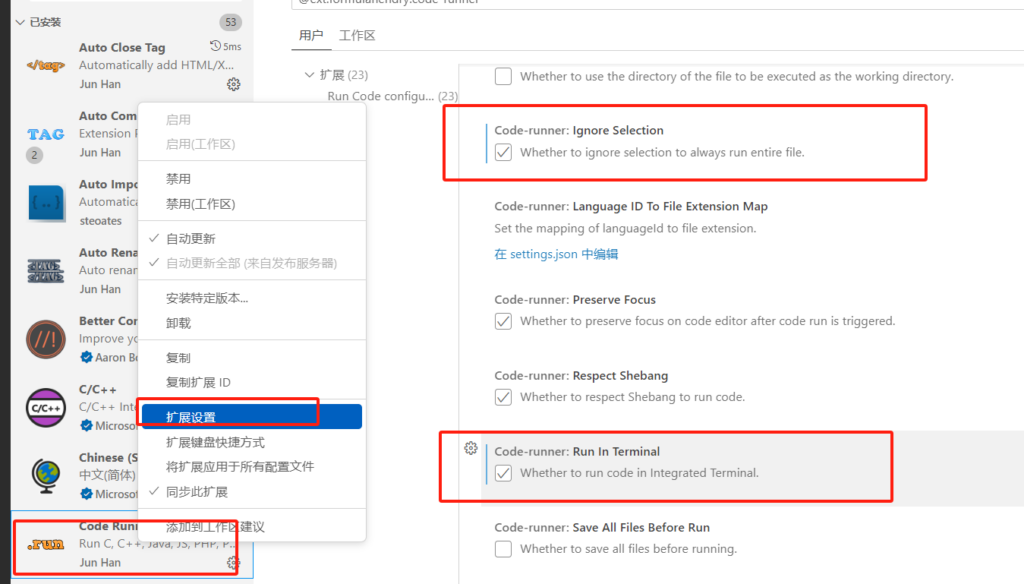
配置vscode插件
Chinese Language Pack for Visual Studio Code 中文(简体)
(英语好不安装中文汉化也可以)
Code Runner 万能代码运行工具
右键扩展设置勾选框出来的
安装 C/C++ 插件
安装步骤如下:
- 使用快捷键
Ctrl + Shift + X 呼出扩展面板
- 在搜索框中输入:C/C++
- 再安装名为 C/C++ 插件。

安装 MinGW-w64 并配置好环境变量
可以直接在网盘下载安装
链接:https://pan.baidu.com/s/14zdLyV5ioY7v6EvqDZjOZw
提取码:lxz3
免安装版本。下载后直接解压想安装的文件夹。
在安装路径中找到 bin 文件夹,我的安装路径为例,bin 文件夹位于 E:\MinGW-w64\mingw64\bin
接下来,我们将刚刚获取的 bin 文件夹的路径添加到系统环境变量。
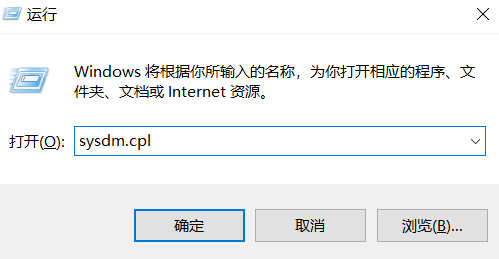
- 按
Win + R 键,打开运行窗口,,输入 sysdm.cpl 并回车;
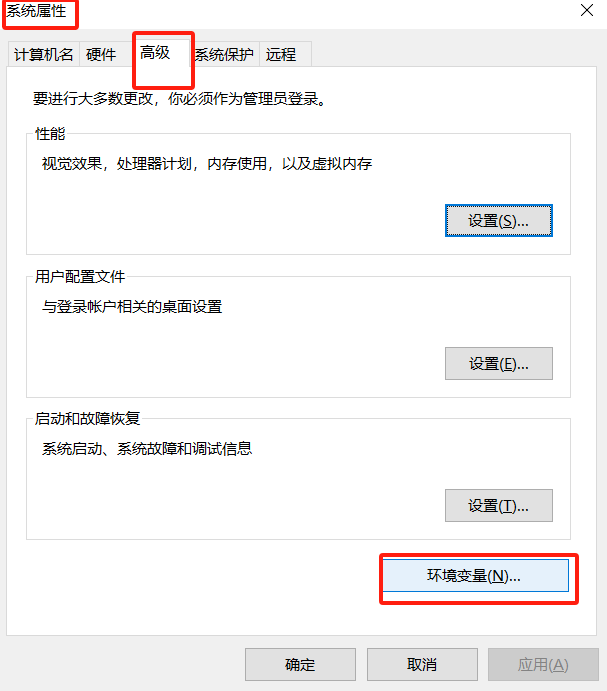
- 在弹出的
系统属性 窗口,选择 高级 选项卡;
- 在
高级 选项卡找到 环境变量 按钮,单击 环境变量 按钮,打开 环境变量 窗口 ;
- 在
环境变量 窗口的 系统变量 区域找到 Path 变量 ,双击 Path 出现 编辑环境变量 窗口;
- 在
编辑环境变量 窗口点击 新建,在新建的这行输入我们刚刚获取的 bin 文件夹的路径,然后点确定。
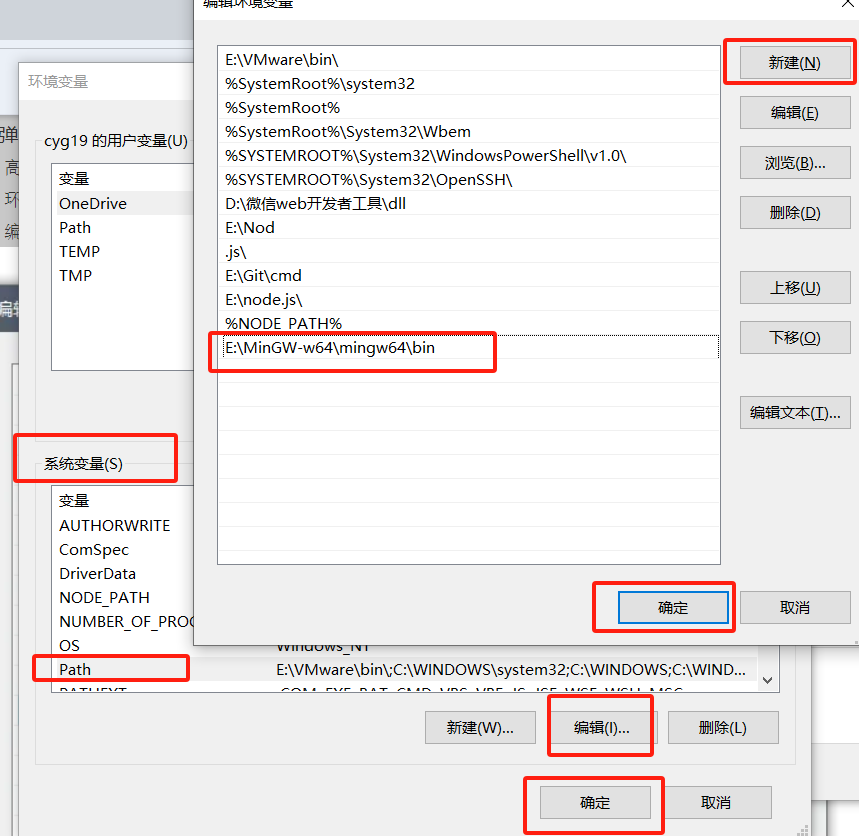
用户变量的Path和系统一样
测试环境变量是否配置正确
在终端命令行 win+X(管理员)
(我习惯性管理员模式打开了,不确定不是管理员会不会出错)输入 gcc —version,如果返回的是已安装的 gcc 的版本信息,那么环境变量就配置正确了。
下面是在我的电脑上输入gcc --version 的结果,可以看到我安装的版本为:gcc 7.3.0

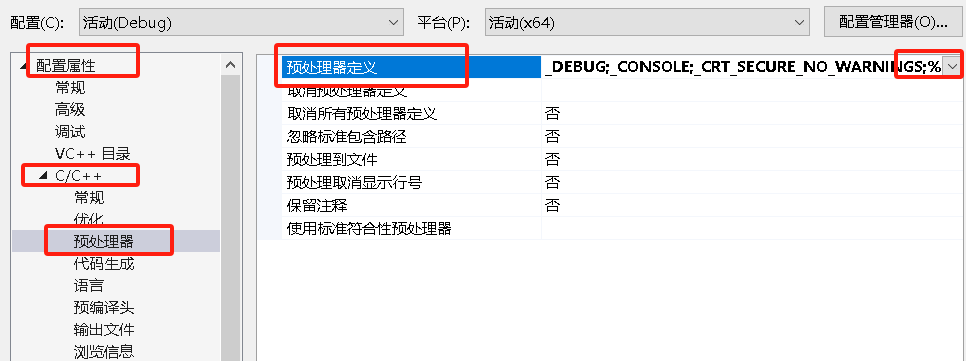
配置三个文件 c_cpp_propertise.json、launch.json、tasks.json
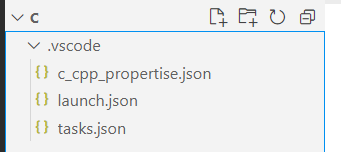
建一个单独存放C语言的文件夹(不要是中文)

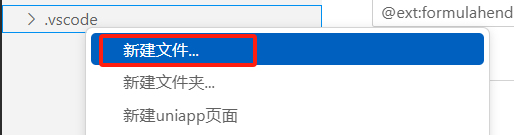
在vscode中打开C文件夹选择文件夹C之后点击新建文件夹命名为.vscode
共在.vscode文件夹下新建三个文件,名字是**c_cpp_propertise.json、 launch.json、 tasks.json**
复制粘贴到文件里,需要修改的地方都标出来了
特别注意的是,如果用的是C++,那么三个文件中的gcc要改成g++
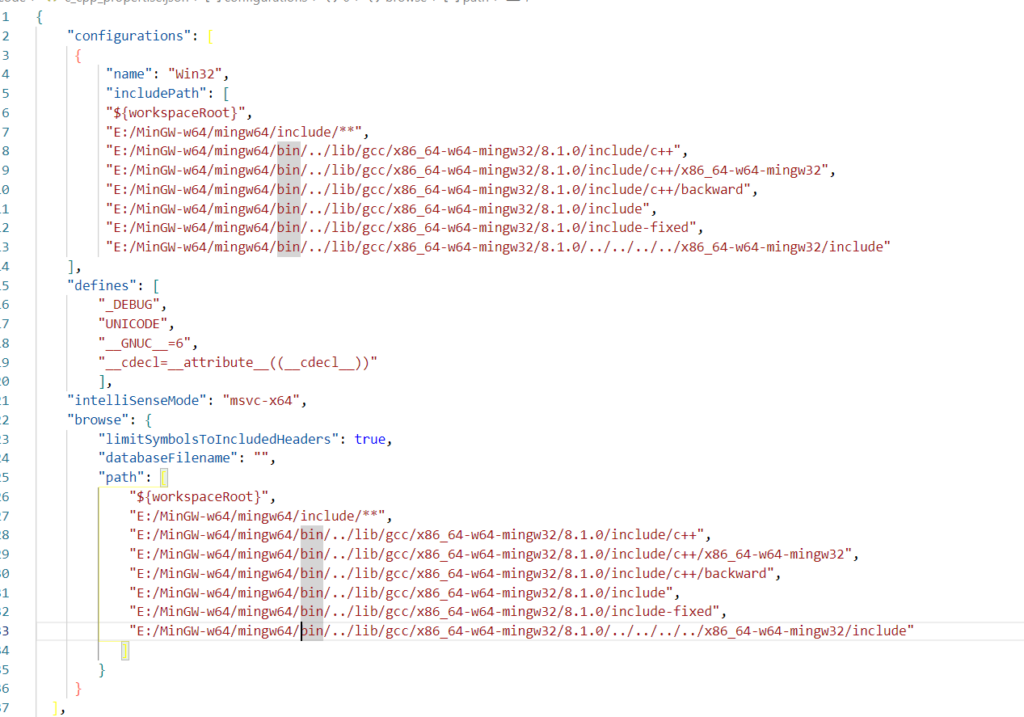
c_cpp_propertise.json
在这个代码中,我们需要把地址改成自己的mingw 64 bin的地址
如果使用c++,把gcc改成g++,如”E:/MinGW-w64/mingw64/bin/…/lib/g++/x86_64-w64-mingw32/8.1.0/include/c++”
例如我的:

1
2
3
4
5
6
7
8
9
10
11
12
13
14
15
16
17
18
19
20
21
22
23
24
25
26
27
28
29
30
31
32
33
34
35
36
37
38
39
40
| {
"configurations": [
{
"name": "Win32",
"includePath": [
"${workspaceRoot}",
"E:/MinGW-w64/mingw64/include/**",
"E:/MinGW-w64/mingw64/bin/../lib/gcc/x86_64-w64-mingw32/8.1.0/include/c++",
"E:/MinGW-w64/mingw64/bin/../lib/gcc/x86_64-w64-mingw32/8.1.0/include/c++/x86_64-w64-mingw32",
"E:/MinGW-w64/mingw64/bin/../lib/gcc/x86_64-w64-mingw32/8.1.0/include/c++/backward",
"E:/MinGW-w64/mingw64/bin/../lib/gcc/x86_64-w64-mingw32/8.1.0/include",
"E:/MinGW-w64/mingw64/bin/../lib/gcc/x86_64-w64-mingw32/8.1.0/include-fixed",
"E:/MinGW-w64/mingw64/bin/../lib/gcc/x86_64-w64-mingw32/8.1.0/../../../../x86_64-w64-mingw32/include"
],
"defines": [
"_DEBUG",
"UNICODE",
"__GNUC__=6",
"__cdecl=__attribute__((__cdecl__))"
],
"intelliSenseMode": "msvc-x64",
"browse": {
"limitSymbolsToIncludedHeaders": true,
"databaseFilename": "",
"path": [
"${workspaceRoot}",
"E:/MinGW-w64/mingw64/include/**",
"E:/MinGW-w64/mingw64/bin/../lib/gcc/x86_64-w64-mingw32/8.1.0/include/c++",
"E:/MinGW-w64/mingw64/bin/../lib/gcc/x86_64-w64-mingw32/8.1.0/include/c++/x86_64-w64-mingw32",
"E:/MinGW-w64/mingw64/bin/../lib/gcc/x86_64-w64-mingw32/8.1.0/include/c++/backward",
"E:/MinGW-w64/mingw64/bin/../lib/gcc/x86_64-w64-mingw32/8.1.0/include",
"E:/MinGW-w64/mingw64/bin/../lib/gcc/x86_64-w64-mingw32/8.1.0/include-fixed",
"E:/MinGW-w64/mingw64/bin/../lib/gcc/x86_64-w64-mingw32/8.1.0/../../../../x86_64-w64-mingw32/include"
]
}
}
],
"version": 4
}
|
launch.json
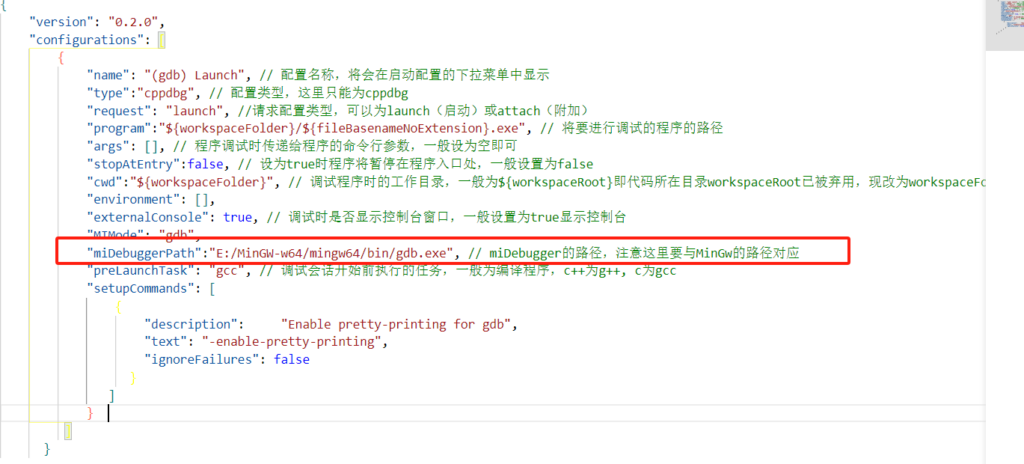
在这个代码中,需要改miDebuggerPath为自己的路径
1
2
3
4
5
6
7
8
9
10
11
12
13
14
15
16
17
18
19
20
21
22
23
24
25
26
| {
"version": "0.2.0",
"configurations": [
{
"name": "(gdb) Launch", // 配置名称,将会在启动配置的下拉菜单中显示
"type":"cppdbg", // 配置类型,这里只能为cppdbg
"request": "launch", //请求配置类型,可以为launch(启动)或attach(附加)
"program":"${workspaceFolder}/${fileBasenameNoExtension}.exe", // 将要进行调试的程序的路径
"args": [], // 程序调试时传递给程序的命令行参数,一般设为空即可
"stopAtEntry":false, // 设为true时程序将暂停在程序入口处,一般设置为false
"cwd":"${workspaceFolder}", // 调试程序时的工作目录,一般为${workspaceRoot}即代码所在目录workspaceRoot已被弃用,现改为workspaceFolder
"environment": [],
"externalConsole": true, // 调试时是否显示控制台窗口,一般设置为true显示控制台
"MIMode": "gdb",
"miDebuggerPath":"E:/MinGW-w64/mingw64/bin/gdb.exe", // miDebugger的路径,注意这里要与MinGw的路径对应
"preLaunchTask": "gcc", // 调试会话开始前执行的任务,一般为编译程序,c++为g++, c为gcc
"setupCommands": [
{
"description": "Enable pretty-printing for gdb",
"text": "-enable-pretty-printing",
"ignoreFailures": false
}
]
}
]
}
|
tasks.json
如果使用c++,要把command的gcc改为g++
1
2
3
4
5
6
7
8
9
10
11
12
13
14
15
16
17
| {
"version": "2.0.0",
"command": "gcc", // 注意对应
"args":["-g","${file}","-o","${fileBasenameNoExtension}.exe"], // 编译命令参数
"problemMatcher": {
"owner": "cpp",
"fileLocation":["relative","${workspaceFolder}"],
"pattern": {
"regexp": "^(.*):(\\d+):(\\d+):\\s+(warningerror):\\s+(.*)$",
"file": 1,
"line": 2,
"column": 3,
"severity": 4,
"message": 5
}
}
}
|
重启与调试
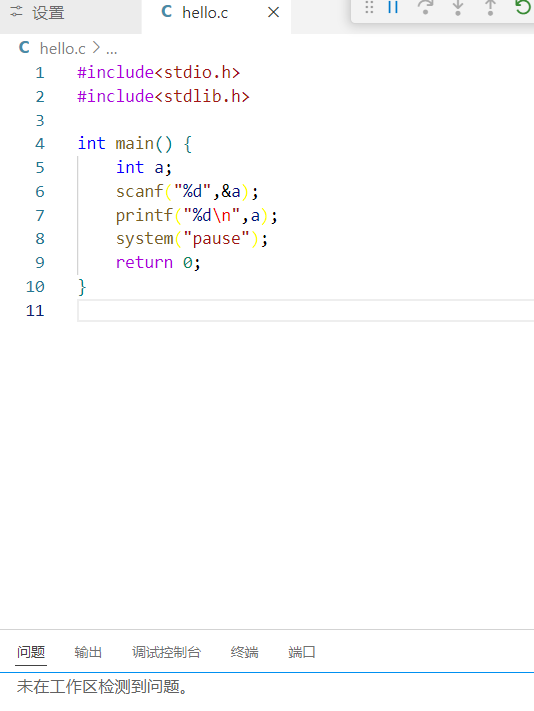
重启vscode,在文件夹C上新建一个以.c结尾的文件
这里我们简单编写一个C语言的程序,设置断点并调试
1
2
3
4
5
6
7
8
9
10
| #include<stdio.h>
#include<stdlib.h>
int main() {
int a;
scanf("%d",&a);
printf("%d\n",a);
system("pause");
return 0;
}
|
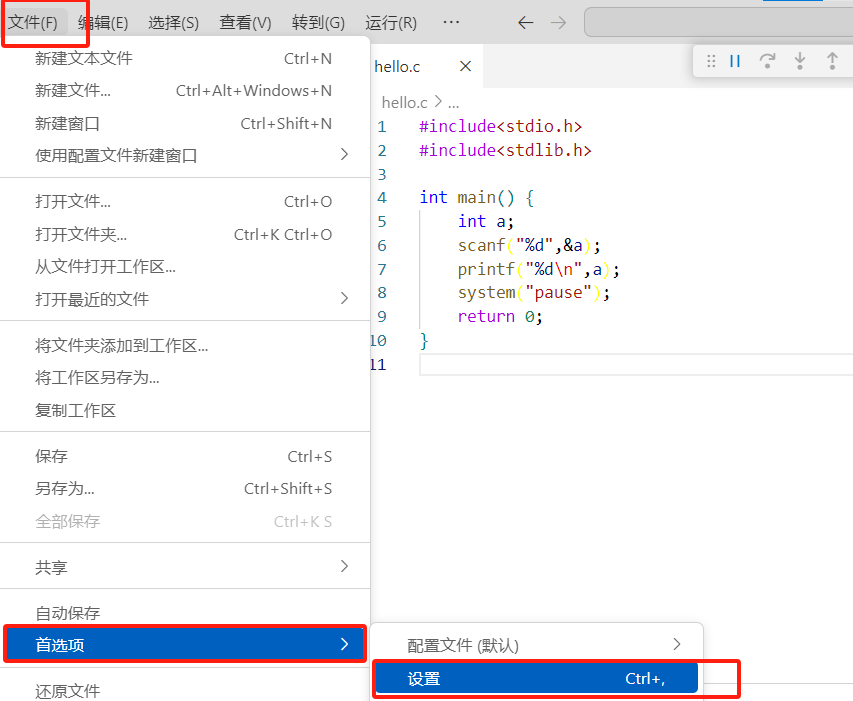
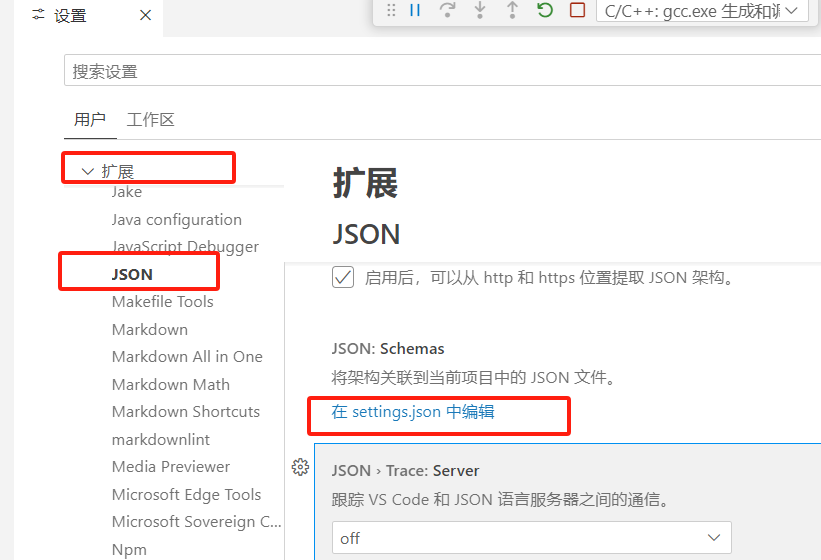
终端中文乱码问题
找到setting.json文件
文件->首选项->设置,输入setting.josn,在下图框中位置打开文件
添加一下代码
1
2
3
4
5
6
7
8
9
10
11
12
13
14
| {
"terminal.integrated.profiles.windows": {
"PowerShell": {
"source": "PowerShell",
"overrideName": true,
"args": ["-NoExit", "/c", "chcp 65001"],
"icon": "terminal-powershell",
"env": {
"TEST_VAR": "value"
}
}
},
"terminal.integrated.defaultProfile.windows": "PowerShell",
}
|